Momentary Zine

The Momentary Zine is an interactive publishing installation and has been shown at MU Eindhoven, Automata Festival in Bucharest, Zinefest Berlin, Libre Graphics Meeting 2016 in London, Northside Festival in NY and FORMS Festival in Toronto. H&D has custom developed software to create the zine, which is open source and available on [Github]. With the help of speech to text technology the spoken word translates to text. Simultaneously an algorithm runs an automated image search on Google or Imgur, querying the spoken words and adding the image results accordingly to the zine layout. The outcome is a printed zine. The publishing installation is small and therefore lends itself to travel with and therefore to show at events. The installation consists of a microphone, a small thermal printer (receipt printer), some simple bookbinding tools and an Internet connection. With a simple hack of the printer (software) the temporality and actuality of the event can be captured, printed and distributed. The zine content is exclusively accumulated by speaking into a microphone, which has proven qualities of empowerment for the participating audience. By literally speaking up, the spoken word manifests itself in a printed output.
The immediacy of the voice as the main content generator and the possibility of starting a dialogue with the technology serve as vehicle for participation and furthermore enables conversations about unusual publishing methods and the possibilities of technology in that context.


Repository

Momentary Zine
Hackers & Designers build an open publishing station. At this publishing station everyone is invited to co-create and examine editorial design matters such as cross-media publishing. Using a thermal printer (receipt printer) as a point of departure the visitors were be the subject of the accumulating publication and simultaneously active content providers.
Thermo print has the characteristic of vanishing after a while. With an easy hack of the printer software we capture the temporality and actuality of the event and printed matter as such. The zine content is exclusively accumulated by speaking into a microphone. With text to speech technology the spoken word translates to text. Simultaneously an algorithm is will run an automized image search on google, grabbing some of the words randomly and adding them to the zine.
Dependencies
- Install WK HTML to Pdf. Download here http://wkhtmltopdf.org/downloads.html
Usage
Start the web server
Download the momentary zine repository from github and unpack the .zip file https://github.com/hackersanddesigners/momentary-zine
Run the following command in Terminal/Command-line from inside the directory/folder momentary-zine-master you got from git.
$ sudo ./server.sh
If it asks for a password, it wants the pass of your laptop/computer. Don't worry it's in localhost.
(If you want to stop the server, hit control + C)
Configuration Receipt printer
Install CUPS
If you have a printer, particularly, a receipt printer or something with non-standard format, configure it with CUPS in the browser. CUPS is a standards-based, open source printing system developed by for Apple products. CUPS uses IPP Everywhere™ to support printing to local and network printers.
Download and install the latest version for Mac: via STAR Micronics manufacturer website
The receipt printer described here is a Star TSP100 FuturePRNT with cutting feature.
Setting up the printer via CUPS
When CUPS is installed. Restart your computer.
Then navigate to this page in Google Chrome browser:
[http://localhost:631] (http://localhost:631)
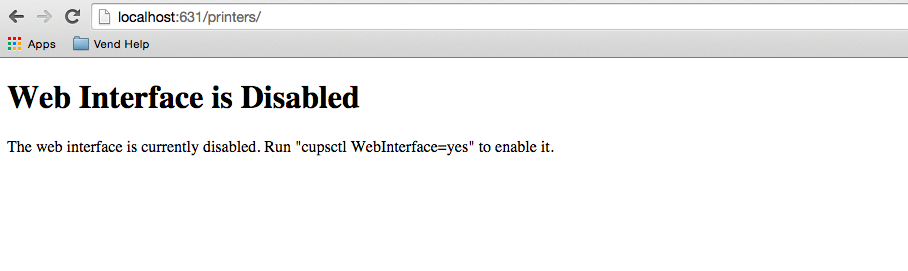
As the CUPS Web Interface may be disabled by default on your Mac, you will need to enable it in order to have your Thermal Receipt printers appear on the network. If this is the case, a screen will then appear saying Web Interface is Disabled. An indication that CUPS has been disabled on your particular Mac device.
To enable CUPS
Open the application Terminal on your Mac. In the window that opens, copy/paste the following command and press ENTER.
cupsctl WebInterface=yes
Now refresh the page in chrome with the url http://localhost:631, and the CUPS interface should show up and you can add your printer.
Add the printer
Power the receipt printer (button on the left), and connect the USB cable to your laptop.
Under Administration you will see the button Add Printer
You will be asked to sign in to verify you are an administrator of the computer you are working on. So you fill in the username of your laptop and corresponding password.
Don't worry you are running CUPS locally on your machine. You are only viewing this software via a browser window, you are not sending your details over the internet. You can also do this with wifi turned off if you don't believe me :)
You will now see a list of printers. If all went well it should say Star TSP143 (SRT_T_001)(Star TSP143 (STR_T_001)) at the top under "local printers"

Select that one and press continue. Then select STAR TSP100 CUTTER and continue to select the right driver for the printers we have.
Configure the printer
If it is installed, go to Printers
In the dropdown that says Administration, choose Set default options
- In General, set 72mm x 200mm as media size using the dropdown
- Go to Cut Options and set both to Partial cut
- Go o Output Options and select page type: Fixed length
Set printer as default on your system
Go to the printer settings on your computer and make sure STAR TSP100 (or whatever name you gave it) is set as default printer.
Now you can use the receipt printer the same way you would use any other printer. In the print dialog box you can explore the dropdowns for different options like you are used to. Just make sure the paper size is set to 72x200mm.
Reprint jobs
CUPS will keep track of all your print jobs, this makes it easy to reprint a job without sending it again. To do so: go to localhost:631 again in Chrome. And find the button Jobs in the top menu.
You will see a list of all your recent print jobs and what printer it was sent to. By clicking reprint you can reprint previous jobs. In most cases, reprinting via CUPS is faster and easier than going through the print dialog again.
Browse to (Only works in Chrome):
Make sure the server is running by running the command sudo ./server.sh from the location of the momentary-zine-master folder
Now browse to the interface by putting this url in your Chrome browser
[https://localhost/index.html] (https://localhost/index.html)
Remember to give your browser permission to access your microphone.
Voice commands
Start speaking to provide content for the momentary zine
Say the word PRINT to print a segment when you are happy with it.
If the tool records more than 150 characters it will automatically print to empty the buffer.
Check terminal if it doesn't print
Is it sent to a different printer in your installed printers?
Go into system settings on computer and make set the Star printer as default printer
You can review pending print jobs and error in the CUPS interface to for troubleshooting: http://localhost:631/printers
If nothing works, terminate the server process in terminal by hitting CTRL + C. Then restart the server.
Appending all content
Each time a print is generated the zine.html file and the zine.pdf file are overwritten. We've added a file that appends all the content to one html file. It's the file called "zine_all.html" in the folder.
It saves everything so if you want to only save content from a session, be sure to clear the contents of this file (open it, delete everything inside, save it, close it), to start fresh.
Changing the PRINT command to something else
The word print triggers the content to be printed, but is often misheard. You can pick another command to print the content by changing the word 'PRINT' to something else in line 38 of "server.sh"
if char_count > 150 or 'PRINT' in print_content:
Changing font size and image size of print
In line 17 of server.h you can edit these parameters. Typically this is set to 280 px image width and font size 24 pt.
template = "
THE_TEXT
"
Change language of speech-to-text
You can change the language of the speech-to-tech module in file "index.html", line 82. Change it to en_US for english, or fr for French etc.
recognition.lang = 'en_US';
Removing images
This is a hacky way to make images not show up. They still get searched and urls get stored but not loaded in the browser, or loaded really small (1px width) in the printed content. There's a more thorough way, but for another day
To remove images from the browser interface: comment out line 27 in file "index.html" that say
background = 'url(' + http.responseText + ')';
To remove images from the html and pdf files that will be printed. In the file "server.h" change the style for max width of images to 1 px
style='max-width: 1 px;
Exclude GIFs
Gifs dont get printed. If you want to search for still images only, remove the arguments 'gifs' and 'anigifs' from line 53 in the file "server.sh"
Other images
Instead of searching for an image, you can also give a static image url in double quotation marks in line 38 of "server.sh"
content = template.replace('THE_IMAGE', "alternative url here")
Python3 Support - Update
There is a new branch in github, in case you have python3 You can find the branch here
$ git clone https://github.com/hackersanddesigners/momentary-zine.git

$ cd momentary-zine

$ git fetch -a

$ git checkout -b python3 origin/python3

$ sudo ./server.py
Consider looking at the python3 branch for further updates to this section of the README.