Installing ESP32/Arduino libraries
Install libraries
Depending on the situation you may have to install additional libraries. In this specific example we are installing the ESPAsyncWebserver and AsyncTCP libraries that are used in the WifiZine Scavengerhuntworkshop. The process is the same for other libraries.
We assume you have already downloaded and setup the Arduino IDE for use with the ESP32 modules.
Both these libraries are not available to install through the Arduino IDE's manage libraries interface, so we have to install them manually:
ESPAsyncWebServer
- Download the code
- Unzip the downloaded file.
- Remove the "-master" part from the unzipped directory name, so
ESPAsyncWebServer-mastershould now be calledESPAsyncWebServer - Move the renamed directory to your library directory:
- On Windows:
My Documents\Arduino\libraries - On Linux:
{sketchbook folder}/libraries. The sketchbook folder location can be found (or changed) at File > Preferences > Sketchbook location:. This is the location of libraries installed via Library Manager (Sketch > Include Library > Manage Libraries…) or Sketch > Include Library > Add .ZIP Library. You should also manually install libraries to that location. - On MacOS:
~/Documents/Arduino/libraries
AsyncTCP
Much the same as above:
- Download the code
- Unzip the downloaded file.
- Remove the "-master" part from the unzipped directory name, so
AsyncTCP-mastershould now be calledAsyncTCP - Move the renamed directory to your library directory (See above).
Restart the IDE after installation.
Confirming code compilation
- Restart the Arduino IDE (the Arduino software)
- Create a new sketch.
- Copy/paste the following code. This code does nothing, but if it compiles and upload without errors we know that everything is installed correctly.
#include <WiFi.h>
#include <AsyncTCP.h>
#include <ESPAsyncWebServer.h>

void setup() {
}

void loop() {
}
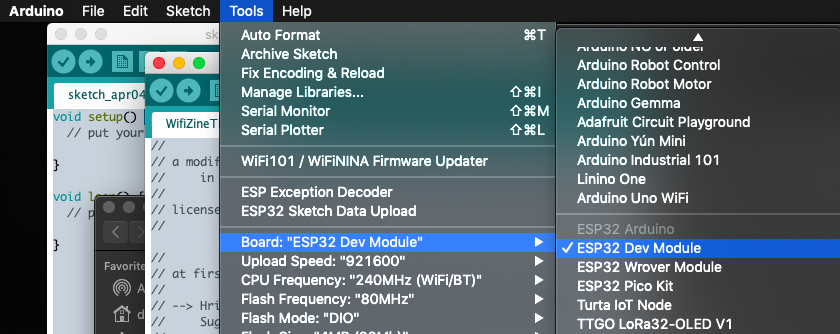
- Select the ESP32 Dev Module board
Compile
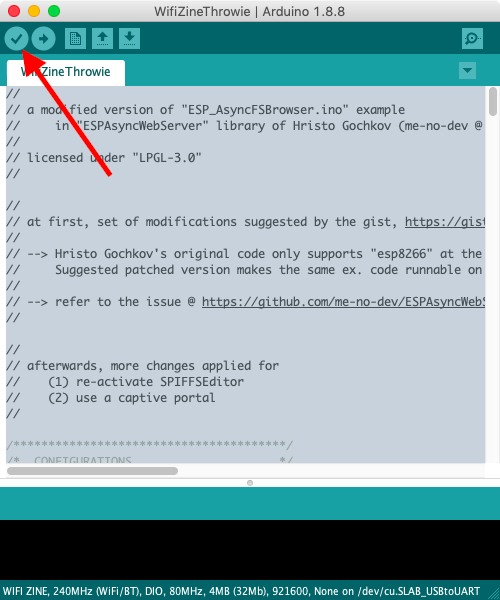
Click on the compile button in the top left of the editor (see red arrow in pic beneath)
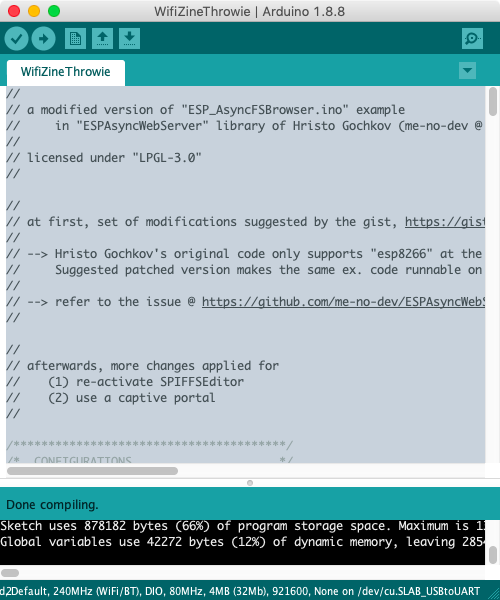
- If the compilation process is successful, it will say “DONE COMPILING” at the bottom
- This means Arduino confirms it can find everything it needs to upload working code
- Don’t upload the code to the board yet, first we need some more stuff
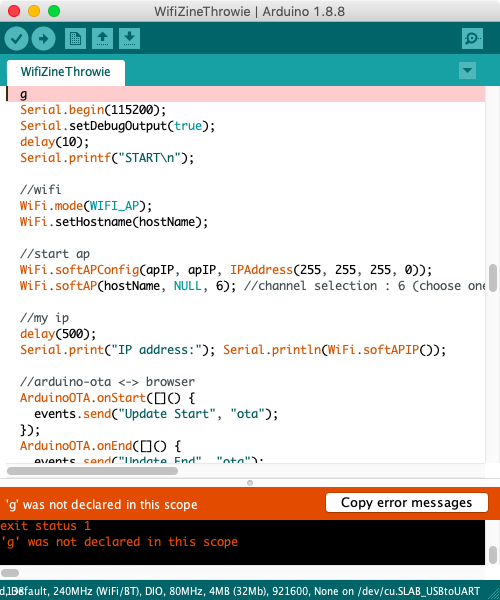
- If the compilation process ends abnormally, it will give an orange error
- If necessary, troubleshoot using the error messages (if you don’t get any, check that “verbose” is checked in settings of Arduino.
Upload to the Board
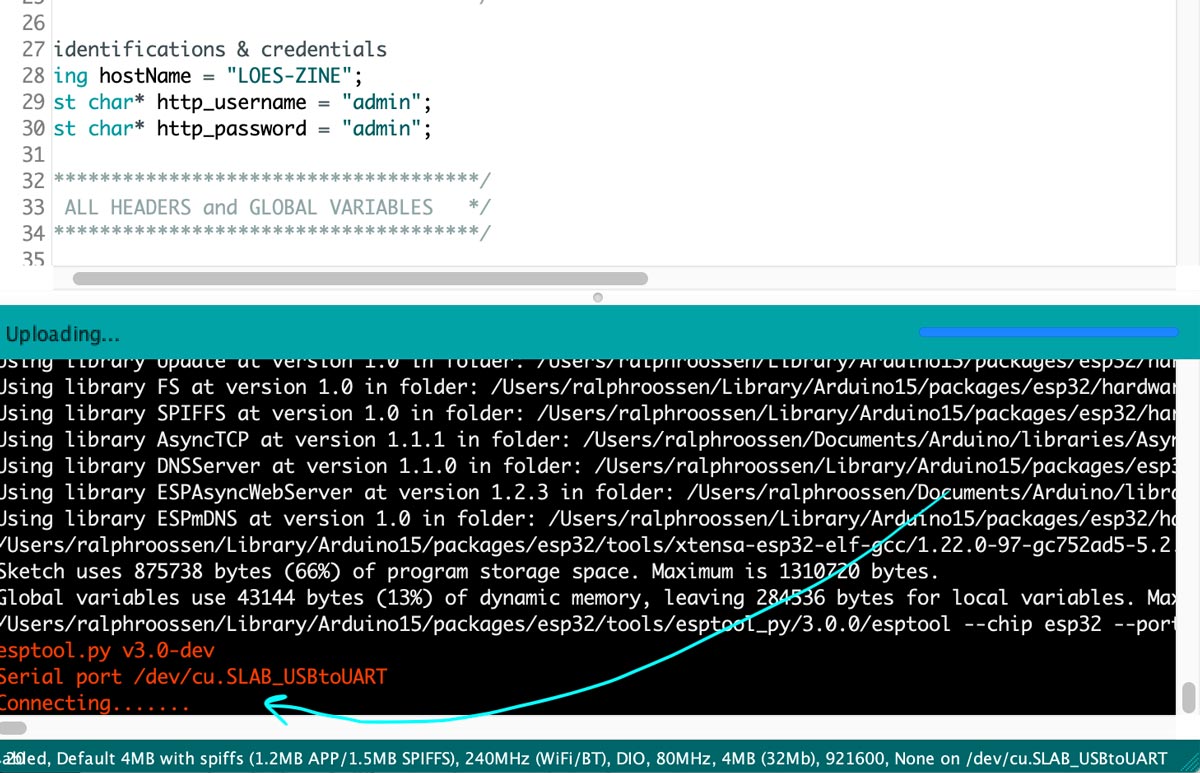
- Click on the Upload button (arrow pointing right on top of the Arduino window), and then while the text ‘Connecting …’ displays in the control window at the bottom of the screen, press and hold the’ BOOT ’button on the ESP board for one second.
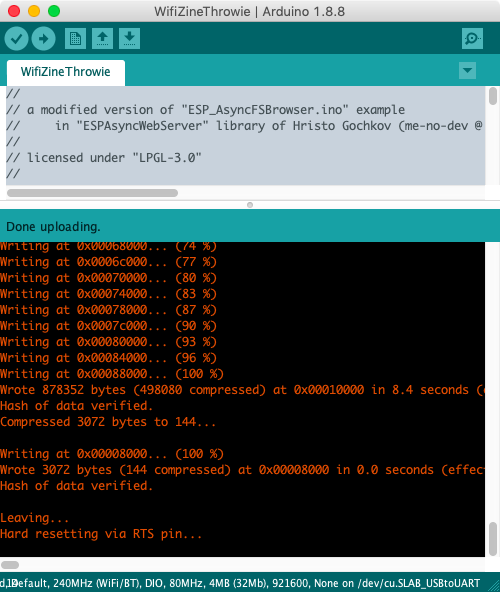
- If the upload was successful, you will see this screen:
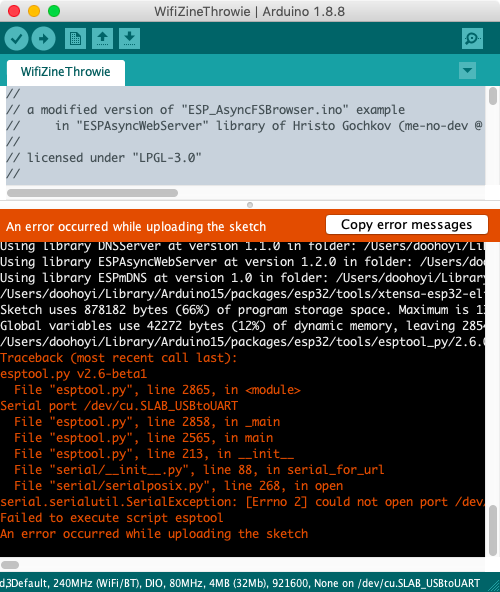
- If the upload was unsuccessful, you will see this error
Troubleshooting tips for various problem factors here
For MacOS users we've collected some common troubleshooting steps here
If everything went well, you are now ready to upload your own code to the board!
Next steps:
You probably want to continue to Uploading a website to the ESP32 module.
