Uploading a website to the ESP32 module
On this you'll find instructions on how to upload a small website to the ESP32 module. It's assumed that you have already set up your Arduino IDE for working with the ESP32 module, if not follow these instructions.
Start by downloading the code for the Wifizine workshop here.
The SPIFFS plugin only works with Arduino IDE 1.8.x, so make sure you are using that version!
Publishing your first mini webpage to the module
- The content of the small webpage we will put on the wifi modules is stored separately from the running code that takes care of publishing it. Therefore, it goes through a separate process from the usual Arduino IDE code upload process. To do this, you need to install a separate extension plug-in.
- Download and install the ESP32FS plug-in
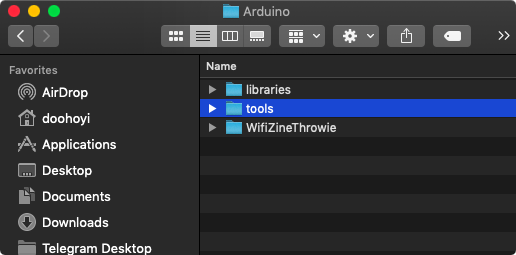
Create a folder called ‘tools’ in your Arduino sketch directory. The location of this folder varies depending on your system:
- On Windows:
My Documents\Arduino\libraries - On MacOS:
~/Documents/Arduino/libraries - On Linux:
{sketchbook folder}/libraries. The sketchbook folder location can be found (or changed) at File > Preferences > Sketchbook location:. This is the location of libraries installed via Library Manager (Sketch > Include Library > Manage Libraries…) or Sketch > Include Library > Add .ZIP Library. You should also manually install libraries to that location.
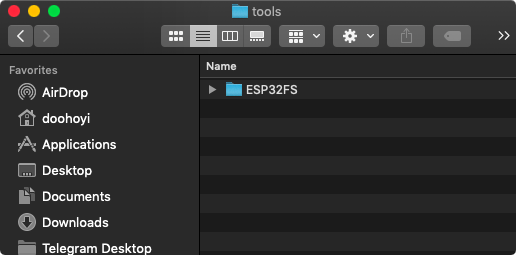
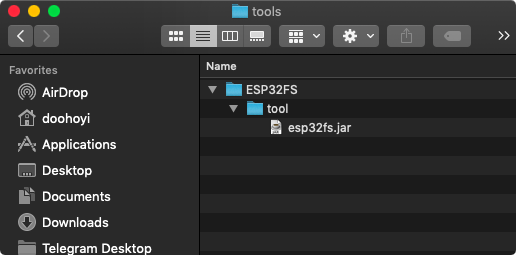
Copy unpacked ESP32FS into the subfolder tools
Be mindful with the construction of the folders. It should be installed as shown in the following figure. (Note also that the folder name is ESP32FS!)
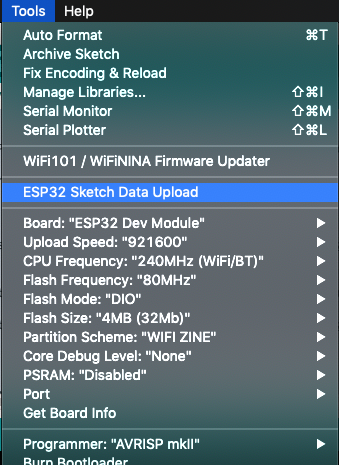
After restarting the Arduino IDE, verify that the plug-in installation was successful. If successful, you will see a menu called ‘ESP32 Sketch Data Upload’ added.
When you click this menu option, it will move all the files in the ‘WifiZineThrowie/data’ folder to the ESP32 module’s web page store.
Changing the name of your wifi network
The arduino code (WifiZineThrowie.ino) specifies the name of your personal mini network by looking for a file in the data folder that ends with .ssid. In the files you downloaded you can see it is now called: “solarpunk-schat.ssid”. You can change this filename to the name you like for your network (avoid symbols to be sure). E.g. Clue1-Loes.
Uploading your website to the module
Then, in the Arduino software, go to > Tools and select > ESP32 Sketch Data Upload
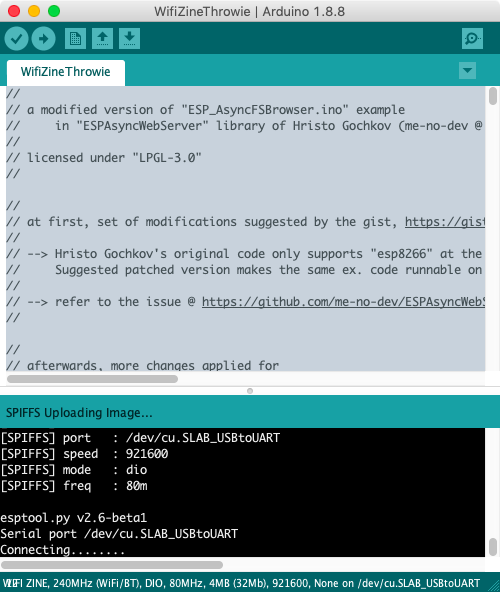
Please execute the upload. The color of the message output during upload is displayed in white instead of red.
While ‘Connecting …’ displays, press and hold the’ BOOT ’button on the ESP board for one second.
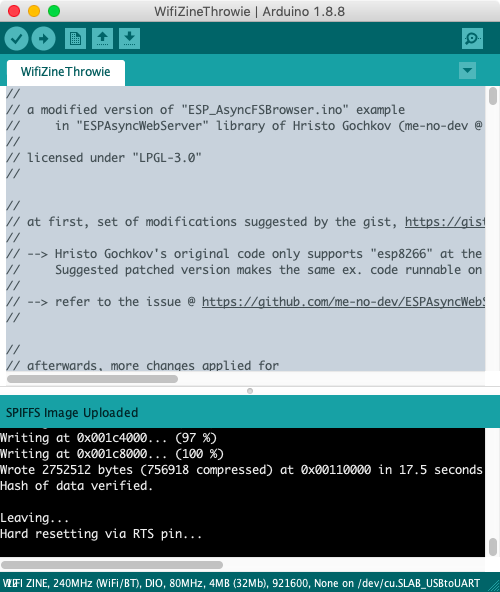
Screen when upload is completed successfully
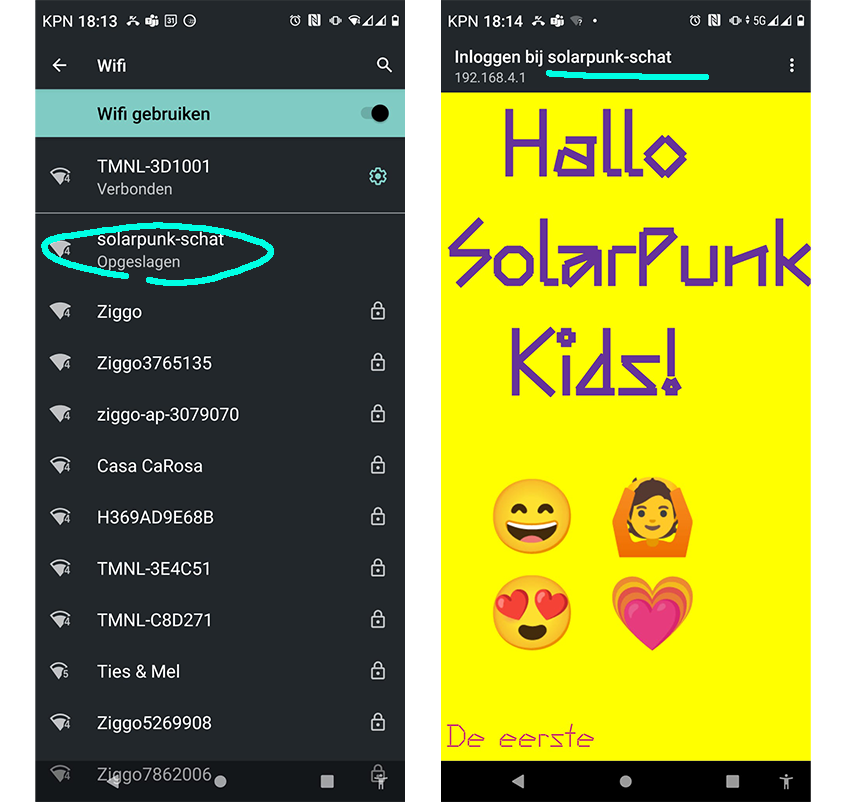
Success! You can now find your private internet spot. Open the network settings on your phone, and select your network. Your website should pop up automatically, but some patience might help :)
Find your wifi network!
Look up the list of available networks on your phone with the name you provided to the .ssid file earlier. You should see your network popping up there. Try connecting to it. Your website should come up automatically with a pop-up window.
Acknowledgments
Is document is heavily based on the wonderful documentation of Dianaband: https://github.com/applecargo/WifiZineThrowie/blob/master/docs/index.md
