Self-driving Toycar: Difference between revisions
No edit summary |
No edit summary |
||
| Line 1: | Line 1: | ||
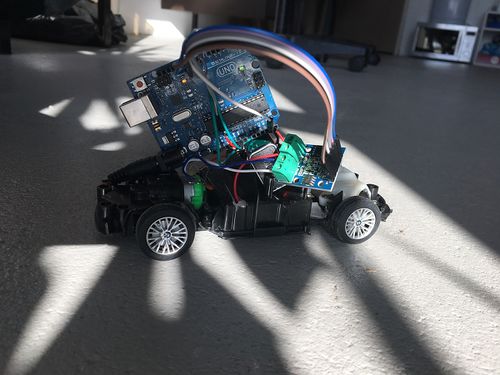
[[File:self-driving-toycar.jpg|500px|self driving toycar]] | [[File:self-driving-toycar.jpg|500px|self driving toycar]] | ||
| Line 8: | Line 6: | ||
* Remove the screws on the bottom and remove the top. | * Remove the screws on the bottom and remove the top. | ||
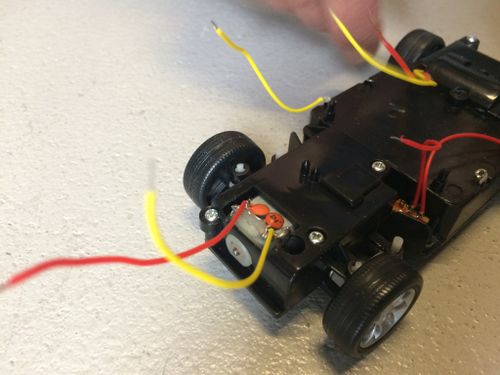
* Cut of all the wires going to the BCP, as close as possible to the PCB. (make sure the power switch keeps working and that it is off) | * Cut of all the wires going to the BCP, as close as possible to the PCB. (make sure the power switch keeps working and that it is off) | ||
[[File:UNADJUSTEDNONRAW_thumb_15ce.jpg|500px|strip]] | |||
=== Connect the Motor driver === | === Connect the Motor driver === | ||
Revision as of 21:43, 27 February 2017
Workshop manual
Deconstuct the car
- Remove the screws on the bottom and remove the top.
- Cut of all the wires going to the BCP, as close as possible to the PCB. (make sure the power switch keeps working and that it is off)
Connect the Motor driver
- IMPORTANT! disconnect the (green) jumper marked PWR right next to the screw terminal marked EXT_PWR
- Connect the motors to driver/h-bridge.
(Add diagram with pin names. Dependent of which driverboard we're going to use.) - Connect the cars' battery to the driver
- Connect (solder) the driver ground to Arduino ground
Test > Sample code to test motors over serial connection.
Connect the line sensor
Module  ->    Arduino
- - - - - - - - - - -
VCC     ->    5V
GND     ->    GND
A0      ->    A0
Upload the car software
Enhance the software
Ideas:
- Add ultrasonic sensor to avoid collisions
- The car now always steers either left or right. Can we add straight ahead?
- Try to make the steering proportional to the error in the line sensor
- Make the light sensor trainable. (Maybe add a button to switch between training / driving mode?)
Connect the line sensor analogue output to A0. GND -> GND VCC -> 5V
Notes
- We need spare batteries!
External links
- HC-SR04 ultrasonic sensor library. https://bitbucket.org/teckel12/arduino-new-ping/downloads
- L293D https://github.com/sudar/DCMotorBot
Used modules:
- https://www.hobbyelectronica.nl/product/l293d-motor-shield/
- https://opencircuit.nl/Product/10540/TCRT5000-Infrarood-lijn-detectie-module-met-instelbare-gevoeligheid
- https://opencircuit.nl/Product/10037/Ultrasonische-afstands-detectie-module
Stuff that might need explaining?
- What is an h-bridge?

